2 Easy Ways to Create Custom Price Filters in Shopify
Custom price filters on Shopify are essential for improving the customer experience. Find out how to create them with these two simple methods.
Updated February 28, 2023
When you're selling a lot of products on your Shopify store within various collections, it can be difficult for customers to find exactly what they need. Using a price filter on your Shopify collections can be a good way to enhance your product organization.
With Shopify, customers can use filters to search through products based on their interests. This means you can also allow customers to search for products within a specific price range.
Below are two of the easiest methods for setting up custom price filters.
1. Creating a Custom Price Filter via Product Variants
Shopify allows store owners to create up to 100 variants and three variant options for each product. You can do this by following these steps:
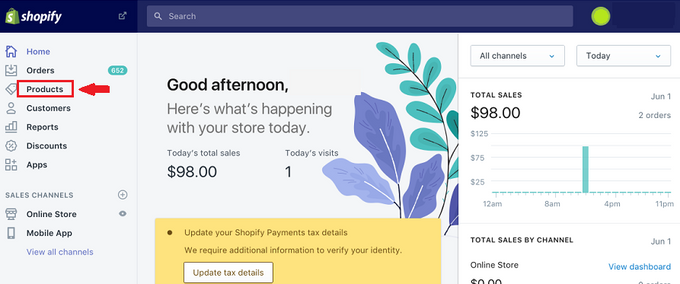
1. Visit the "Products" page in your Shopify admin.
2. Click "All products" and add the product you want, or click "Edit" on an existing product.
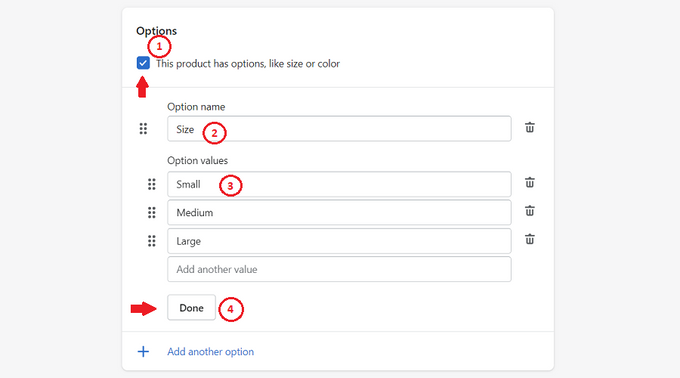
3. In the "Options" section, select "This product has options."
4. When asked to enter a name, include a title for the option, like "Size" or "Price."
5. In the options values, enter each "Value" or price in a separate field.
6. Click "Done."
7. You can add images to the "Variants" section of each product in your collection.
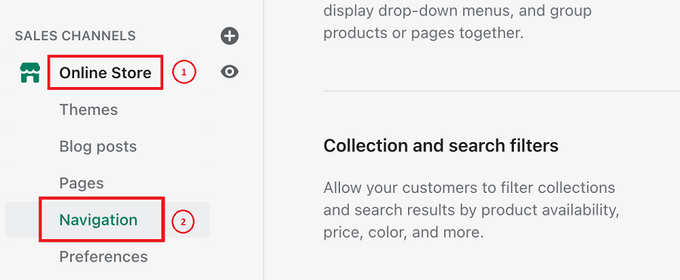
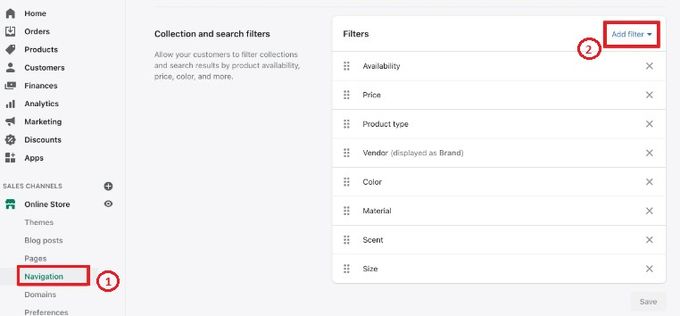
8. You can check whether the product variant is available as a filter option via the "Online Store"> "Navigation" section of the Shopify admin dashboard menu.
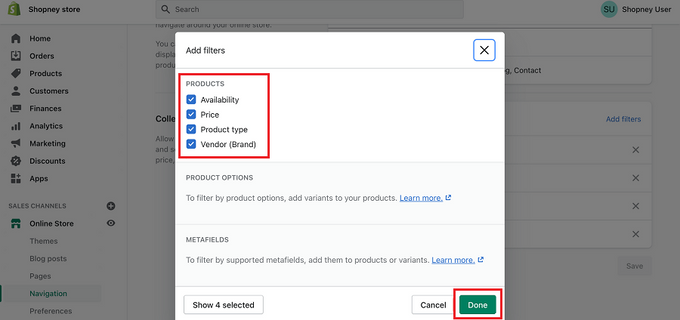
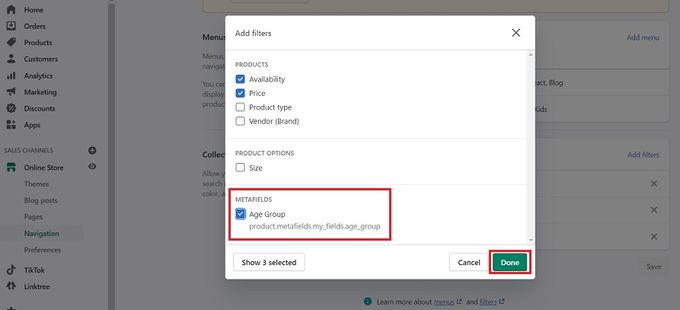
9. Click "Add filters" and select the recently created product variant, then "Done."
2. Creating a Custom Price Filter via Shopify Metafields
Creating custom filters on Shopify through metafields for your product or variant is also possible. To do this, you'll need to ensure your content type is either an integer, decimal number, or single-line text. Once you've ensured this, you can follow these steps:
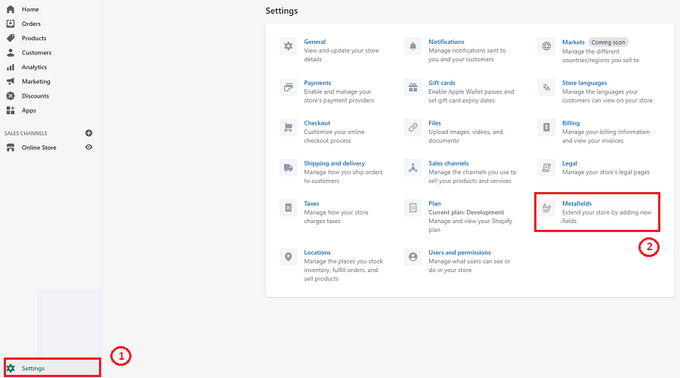
1. Visit "Settings"> "Metafields" from your Shopify admin.
2. Select the type of metafield you want to create.
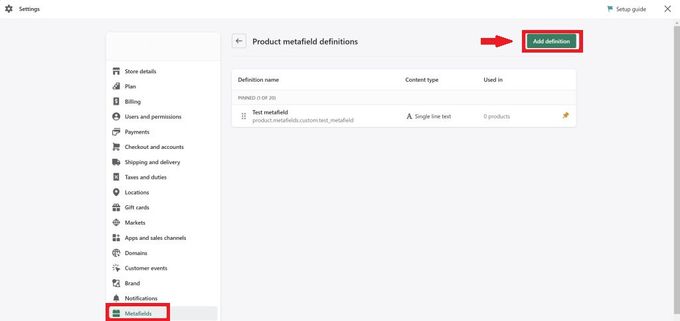
3. Click "Add definition."
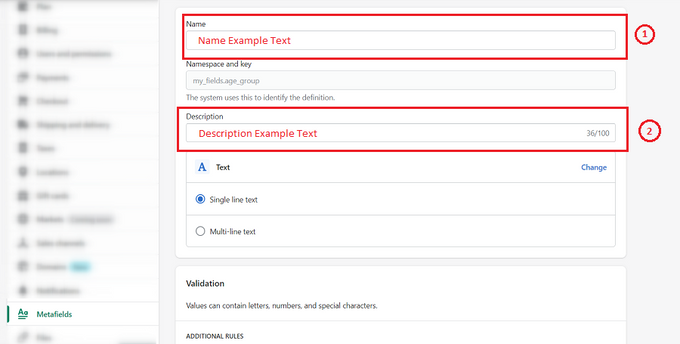
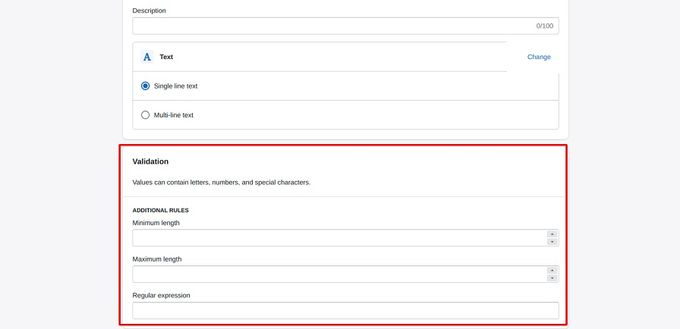
4. Add a name for your definition and enter a description for the metafield value.
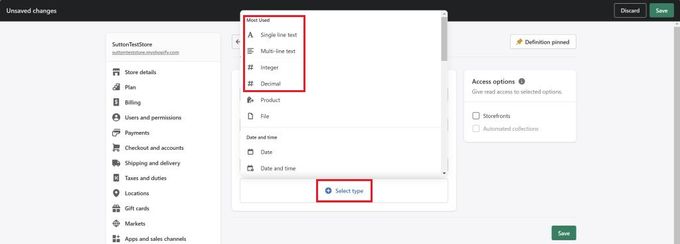
5. Select the content type (number or text). If the content type is text, you can choose "Single line text," whereas, for numbers, you'll choose either "Integer" or "Decimal."
6. Under "Validation," use the "Additional Rules" section to limit the range of accepted values.
7. Click "Save."
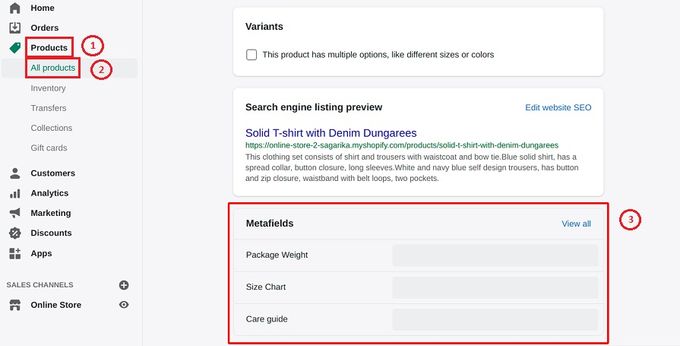
8. Next, go into "Products" then "All Products" from your Shopify admin, and click on a product.
9. Scroll to the "Metafields" section and enter the value for your recently created metafield, then save your changes.
10. You can check your filters by going into the "Navigation" section and clicking "Add filter."
11. In the Metafields option, select the metafield you recently created, followed by "Done."
Improve Customer Experience With Custom Price Filters
Adding custom price filters to your featured Shopify collections is an excellent way to improve the experience for your target audience and help them sort through your products. Thankfully, it can be as simple as following a few basic steps.
Related Articles

How to Create an Abandoned Cart Recovery Email Campaign
Brody Hall
February 10, 2023

Utilizing Shipping Insurance for Your Shopify Store
Brody Hall
June 13, 2021

The Best Way to Integrate and Sync Xero Accounting With Shopify
Brody Hall
June 13, 2021

Do This Before Starting a Blog for Your Shopify Store
Brody Hall
February 10, 2023

4 Expert Tips to Create Better Store Demos Using Sample Data
Adeel Qayum
July 3, 2023
Related Posts
Joel Taylor
Charging US Sales Tax on Shopify
Brody Hall

