How to Reserve Products for Customers on Shopify Using Draft Orders
Updated April 27, 2023

AI Summary
When it comes to managing your online store or e-commerce shop, Shopify draft orders are an often overlooked and underutilized feature.
Draft orders not only display important order information like product taxes, tags, and applicable discounts, but they are also great for sending invoices, taking pre-orders, and, most importantly, holding or reserving high-demand products.
How?
Here we will explain what a draft order is, how and for what purpose it can be used, how to create a draft order, and how a Shopify merchant can reserve items on behalf of their customers.
» Pro tip: Use one of the best store design apps to make your Shopify store stand out
What Are Shopify Draft Orders and Reserve Items?
Shopify draft orders are invoices that merchants create on behalf of a customer from the Shopify admin panel or the Shopify app in order to reserve the item(s) that have inventory tracking enabled. A draft order is converted to a regular order when the merchant accepts it and payment has cleared.
It works like this:
- Once a merchant creates a draft order, they can send a Shopify invoice to the customer requesting to accept order payment.
- By default, this Shopify invoice typically contains a link to a direct checkout page, making it easy for customers to pay for the draft order.
- When the payment method is accepted for the draft order, a regular order will be created on the "Orders" page awaiting order fulfillment.
» Consider download a Shopify shipping app to keep track of orders
Why You Should Value Draft Orders
Well, let's say a customer is browsing your online store and they’ve added a few items to their Shopify shopping cart. After a while, they’ve decided they are satisfied with their purchasing decisions and choose to head to the shopping cart to complete their checkout.
The problem?
Shopify holds items for nobody. It’s first-come, first-served. And, unfortunately for the customer, one of the items has already sold out. Their thirst for material happiness has been shattered, and they decide to bounce, leaving a bad taste in their mouth and a full shopping cart that's begging to be fulfilled.
This, unfortunately, happens way too often in Shopify stores.
It’s a common scenario that's neither good for customer experience nor your business’s reputation. That’s where draft orders come in: they reserve a product on behalf of a customer, ensuring that you never lose a customer ever again. A possible solution for this is to use an app which automatically hides products if they are out of stock.
When Can a Shopify Merchant Use Shopify Draft Orders?
In addition to placing products on reserve or hold and displaying important order information, Shopify draft orders are handy for various reasons.
Here's what they can do:
- Accept Shopify payments for orders that are made over the phone or in-person, rather than online
- Create a wholesale order or apply unique discounts
- Invoice customers for custom items or additional costs that are not included in the merchant's inventory
- Take pre-orders on items that may not be available just yet
- Send invoices to customers who need to pay for an order using a secured checkout link
- Store a Shopify order as a draft and save it for later use or reference.
How to Do a Test Order on Shopify
Sending through a Shopify test order can really help to fine-tune and asses a store's checkout process and settings for order processing, taxes, inventory management, shipping, and email notifications.
This can help Shopify merchants make any tweaks to their store’s checkout process necessary to boost conversion rate optimization and, ultimately, a business’s return on investment. If you’d like to send a Shopify draft to test your customer’s ordering experience, you can place a Shopify test order using a payment provider you’ve integrated into your website. Once the order is placed and you’re happy with the transaction process, all you have to do is immediately refund the order.
To do this, follow these steps:
- Ensure the payment provider you’d like to use to test an order is set up correctly on your site.
- Next, simply make a purchase as any customer would and complete checkout.
- Log into your third-party payment provider account and ensure the order triggered the funds to be processed.
- And lastly, as soon as possible, cancel and refund the order to avoid paying any transaction fees.
» Pro tip: Offering customers buy now pay later options is a good way to increase conversion rates
How to Create a Shopify Draft Order
A merchant can create a draft order on behalf of a customer on the Shopify admin panel. Here's how:
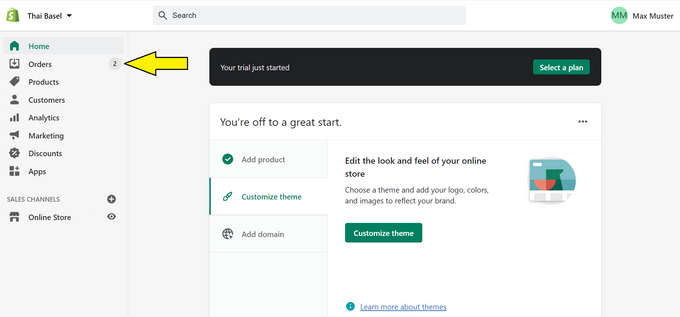
Step 1: Navigate to the Orders Page
From the Shopify admin, click on the "Orders" page.
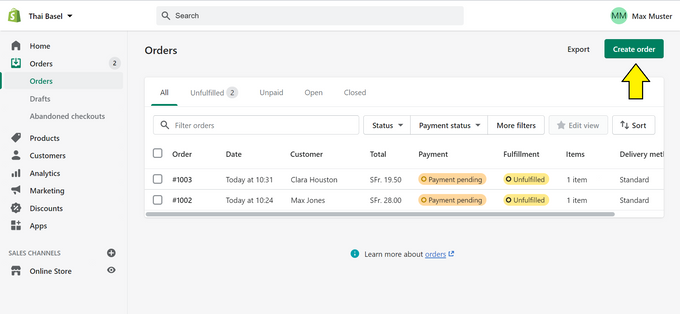
Step 2: Create a New Order or Duplicate an Existing Order/Draft
To create a brand new draft, from the right-hand side of the orders page, simply select the "Create order" button.
To duplicate an existing order or draft from the orders page, click on the relevant order number and, from the "More actions" drop-down menu, click "Duplicate".
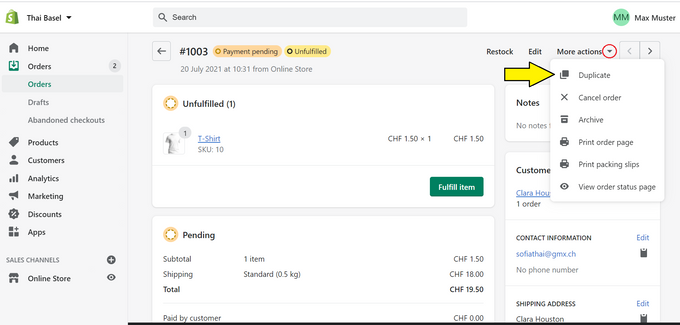
Note: Copied draft orders will not duplicate any discounts or shipping rates applied to the original Shopify order. If they are still applicable to the new order, they will have to be applied once more.
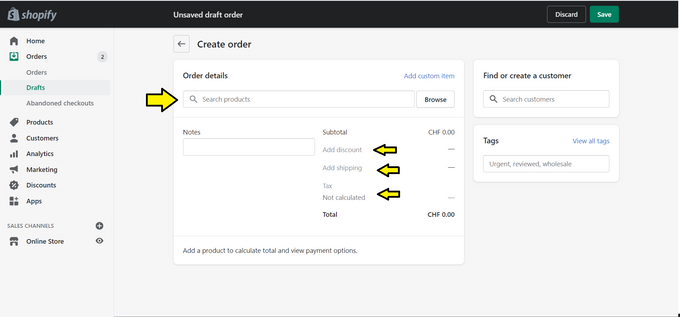
Step 3: Fill in or Customize the Order's Details
From the newly created draft's page, details like the product itself, size of the product, product price, and quantities can all be added and edited.
Other details like adding a customer's details, applying required discounts, including taxes where necessary, and adding tags or notes to the order can all be customized here.
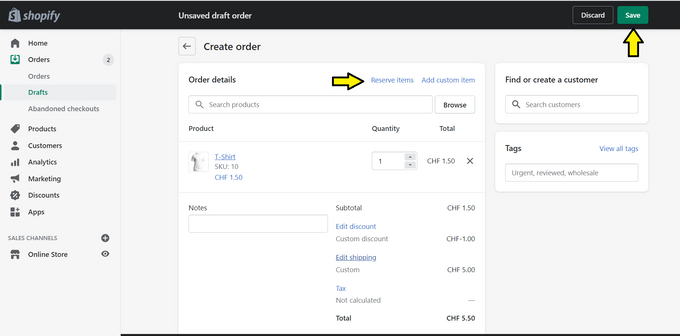
Step 4: Reserve the Products
To nominate a product as Shopify reserve inventory, at the top of the order details, select the "reserve items" text. From here, you can select how long you'd like to reserve the item by modifying both the time and the date.
Once this is completed, click the "save" button:
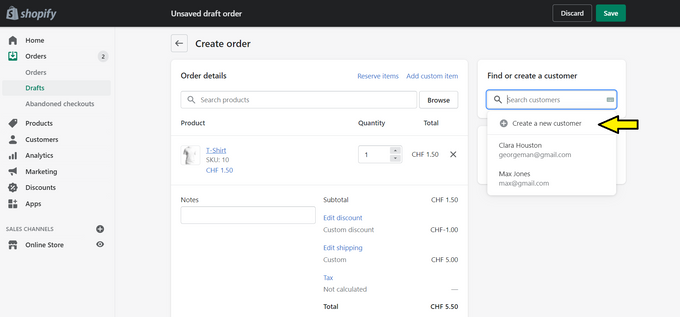
Step 5: Nominate the Customer
To hold the order under a certain customer's name, either search an existing customer or enter a new customer’s details. This can be done by searching for them by name or selecting the “Create a new customer” option from the "Find or create a customer" search bar located on the right-hand side of the order detail panel.
Step 6: Email, Print, Accept Payment or Save
You will then be able to do any of the following options:
- Email the invoice to the customer by clicking "send invoice"
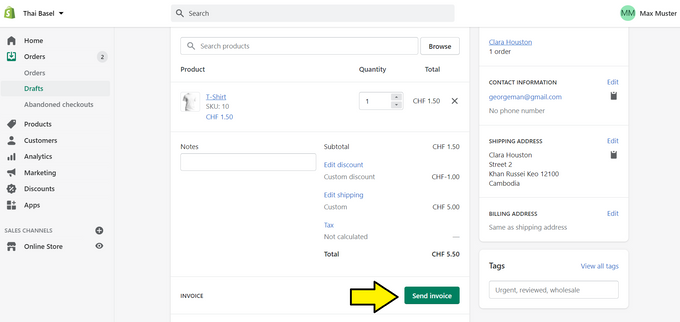
- Print the invoice by clicking "print invoice" from the order printer app
- Accept payment for the order from the customer
- Save the order as a draft
If the order is saved as a draft, you will be able to update and edit it at a later stage on the "Drafts" page.
How to Create an Invoice in Shopify
If you’re unsure exactly how to create a Shopify invoice, don't worry. It’s actually a fairly easy process. Simply follow these steps:
- From your Shopify store admin, click on “Orders” and underneath “Draft”.
- Next, within the Drafts panel click “Create draft order”.
- From there, add the relevant products, customer details, and any tags, taxes, shipping information, etc.
- Once all order details are entered, click the “Send invoice” button.
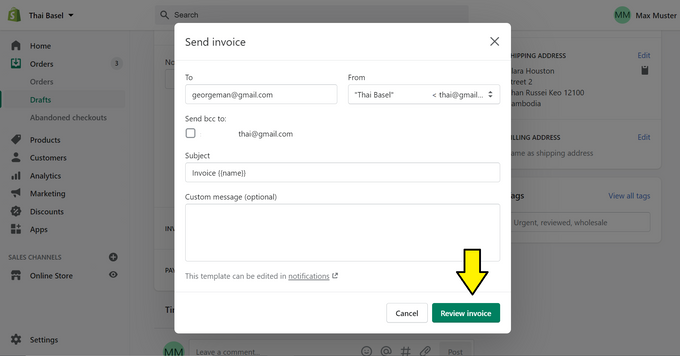
- A Send invoice panel will now pop up, within this panel enter any further order details including the customer’s email, plus an invoice name or custom message.
- Once that is completed, click “Review invoice”.
- Shopify will then give an example of what the invoice is going to look like when the customer receives it.
- If the details are correct and you are happy with how it looks, click “Send notification”.
- From there, it’s all up to the customer. They will soon receive the invoice and can quickly and easily enter their details and pay the amount due without any further intervention from you.
If, for whatever reason, you’d like to create an invoice manually, simply go to Shopify’s free invoice generator, enter the applicable details, and click “Submit”.
How to Change Order of Products on Shopify
Aside from sending a test order or two through, be aware that there is another great way to ensure your customer’s onsite and checkout experiences are completely flawless.
How?
By ordering your products that appear on your category pages in an intuitive way. By default, products are sorted alphabetically, although, often there are much better ways to order your products. For instance, sorting by best-selling is often a great way to showcase your, well, best-selling products that convert frequently.
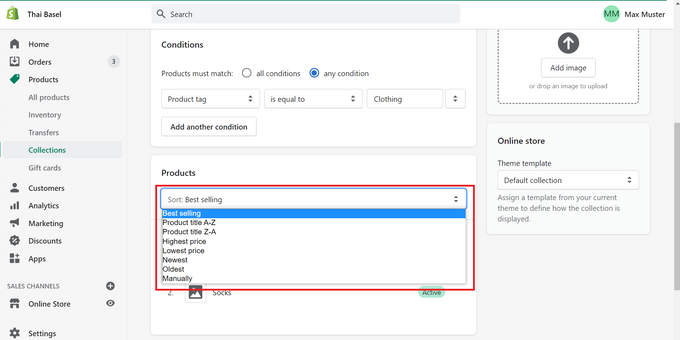
Here’s a full list of the sorting options that Shopify gives you access to:
- Ascending alphabetically A-Z
- Descending alphabetically Z-A
- Best-selling
- Manual order
- Highest to lowest price
- Lowest to highest price
- Newest to oldest date
- Oldest to newest date
You can change the way your products are showcased on a category page by following these steps:
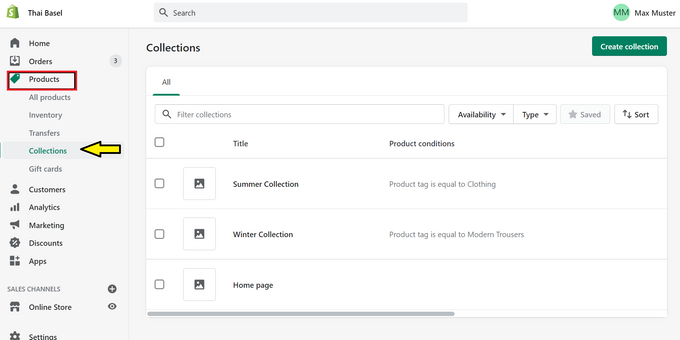
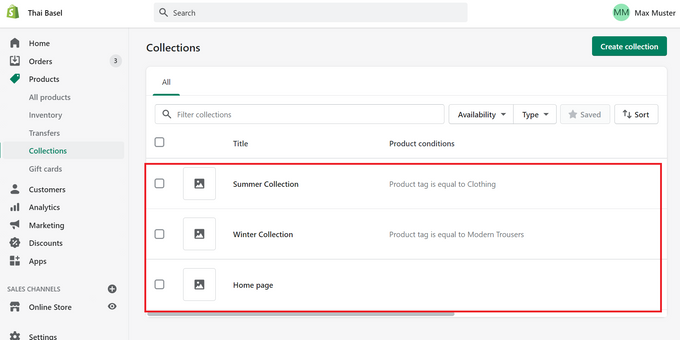
- From your Shopify admin page, click “Products” and then “Collections”.
- From there, select the collection of products you’d like to reorder.
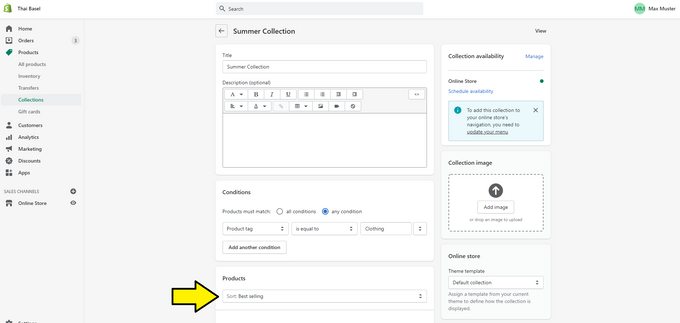
- Now, from the Products section, click the drop-down list located next to the “Sort” button.
- Next, choose whichever order you’d prefer the products appear in.
- If, by chance, you’d like to manually order them, then simply drag and drop the products in whichever order suits your preferences.
- Once you’re happy, simply click “Save”.
Final Thoughts
As you can see, Shopify order drafts are an easy way to create a purchase order, wholesale order, or reserve and hold certain products within your inventory for any of your new or existing customers.
By following these above tips and steps, without failure, you'll now be able to keep even your most FOMO susceptible customers, the type that simply can’t miss out on your best products, super satisfied every single time.